Highland can do a lot more than format dialogue and capitalize scene headings. It has a suite of special tools to meet your specific writing needs.
Many of these features are in the form of Directives
Include
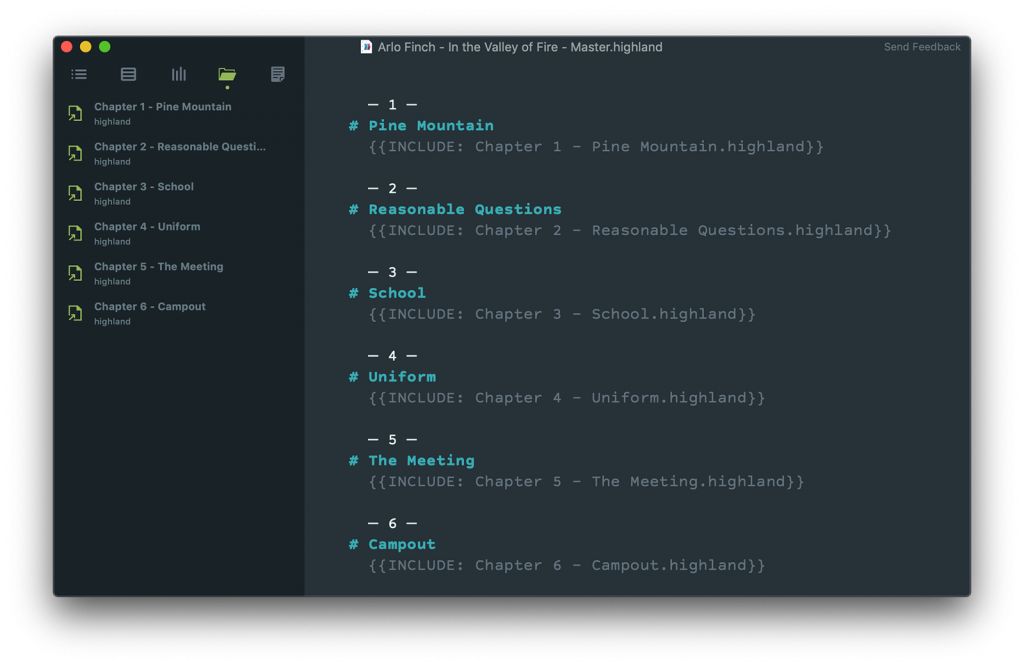
Sometimes one large file for an entire project can feel cumbersome or daunting. Highland lets you write different parts of a project in separate files, then combine them together with the {{INCLUDE}} tag.
Working this way lets you focus on individual sections of a document, like chapters of a book, acts of a TV script, or sections of a longford article or wiki.
Highland makes it easy for you to combine all these separate pieces together.
Just open a new file and drag in each individual .highland file from the Finder on your Mac to the Editor in Highland.
Highland will automatically generate the proper INCLUDE tag, and add your file to the Assets list for the new, primary document. It will look something like this {{INCLUDE: (*file path*)}}
When you switch over to Preview (⌘ Command + E or View > Go To Preview), all the individual files you Included will appear as one continuous document.
You can even add new text in-between Included files!
If you want to separate these pieces of your larger document out, use a page break === between each INCLUDE tag.
Or if you want to create a new document that unifies all of the writing into one .highland file, select File > Assemble… to draw all the text from each individual .highland file added with the INCLUDE tag into a new document.
Series
The {{SERIES}} tag inserts auto-incrementing numbers into your document.
Maybe you’re numbering panels for a comic book script. Maybe you want to add chapter numbers or section numbers to what you’re writing, but want to have Highland keep things orderly in case you decide to move things around.
All you need to do is add {{SERIES}} every place you want a number, and in Preview and Export, Highland will start from the first tag and add one for each tag after.
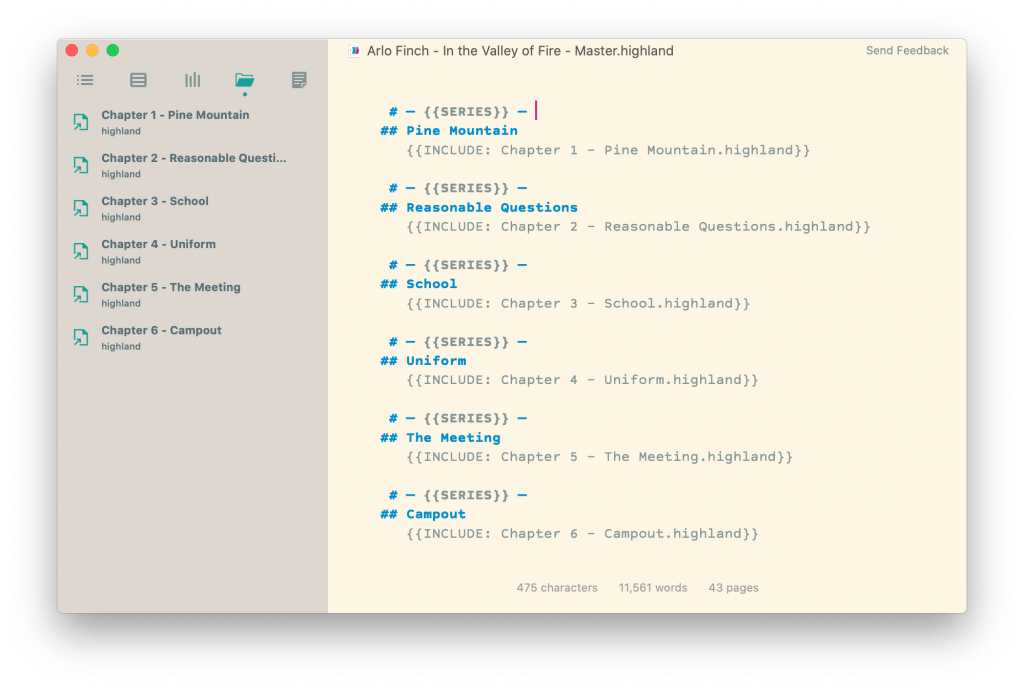
You can also change the starting number by adding it to the tag, such as {{SERIES: 4}}
This means you can also start a new number sequence. Highland starts counting from the start of your document toward the end, so if you want to restart the count, just add {{SERIES: 1}}, and each tag after that will follow in the new sequence.
Table of Contents
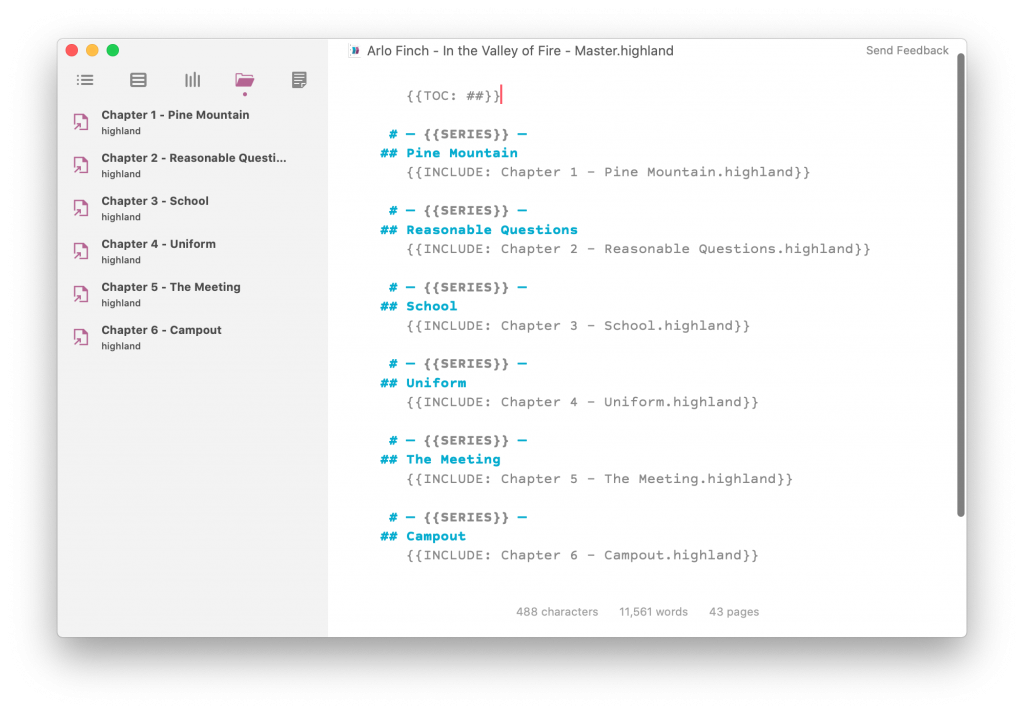
Highland can auto-generate a table of contents based on your # Headers.
Just add {{TOC}} at the part of your document where you want to have a table of contents to start. With the basic tag, Highland will show the page numbers and breakdown based on all Headers, from # to ######
If you only want to list specific levels of Headers from your outline, add them to the tag. For example, if you only want to show H2 and H4 headers, you would add the tag {{TOC: ## ####}}
Headers and Footers
You can make Highland add headers and footers to your pages, along with customizing what appears there.
You can select the command Format > Insert Header or Format > Insert Footer to create the tag, or just type out {{HEADER: }} or {{FOOTER: }}
What goes after the colon and space will be what appears on each page.
For example: {{HEADER: %p/%pp}} would make a header showing you the current page number and the total number of pages.
Highland starts adding Headers and Footers from the start of your document and moving down, so you can stop and start new headers and footers throughout.

The command %none in the {{HEADER: }} or {{FOOTER: }} tag turns off the current Header or Footer starting at that page. You can add a new tag after it to start a new header or footer from that point forward.
You can find more details about header and footer formatting in Highland by selecting Help > Cheat Sheet.
Endnotes
Whether you’re citing a source or just adding additional commentary to something you’re writing, Highland makes endnotes easy.
Just include the text you want as an endnote ((in double parentheses)) in the Editor. The full text inside the parentheses will appear as the endnote.
The Preview and Exported file will include a numbered link that takes you to the Endnote you just wrote.
If you want to choose exactly where endnotes appear in your document, add the tag {{ENDNOTES}}
Timestamp
You can even add a timestamp to your document by adding the tag {{TIMESTAMP}}
You can customize how the time will display by adding a colon and some parameters, such as {{TIMESTAMP: MM/dd/yyyy}}
You can find out more about how to modify the timestamp.
Other Useful Features
Highland 2 has a number of other ways to make writing easier, like Markers, the Gender Analysis tool, and creating links.